Spicy Sriracha Party Meatballs {Grain-Free, Gluten-Free, Paleo}

Meatballs2

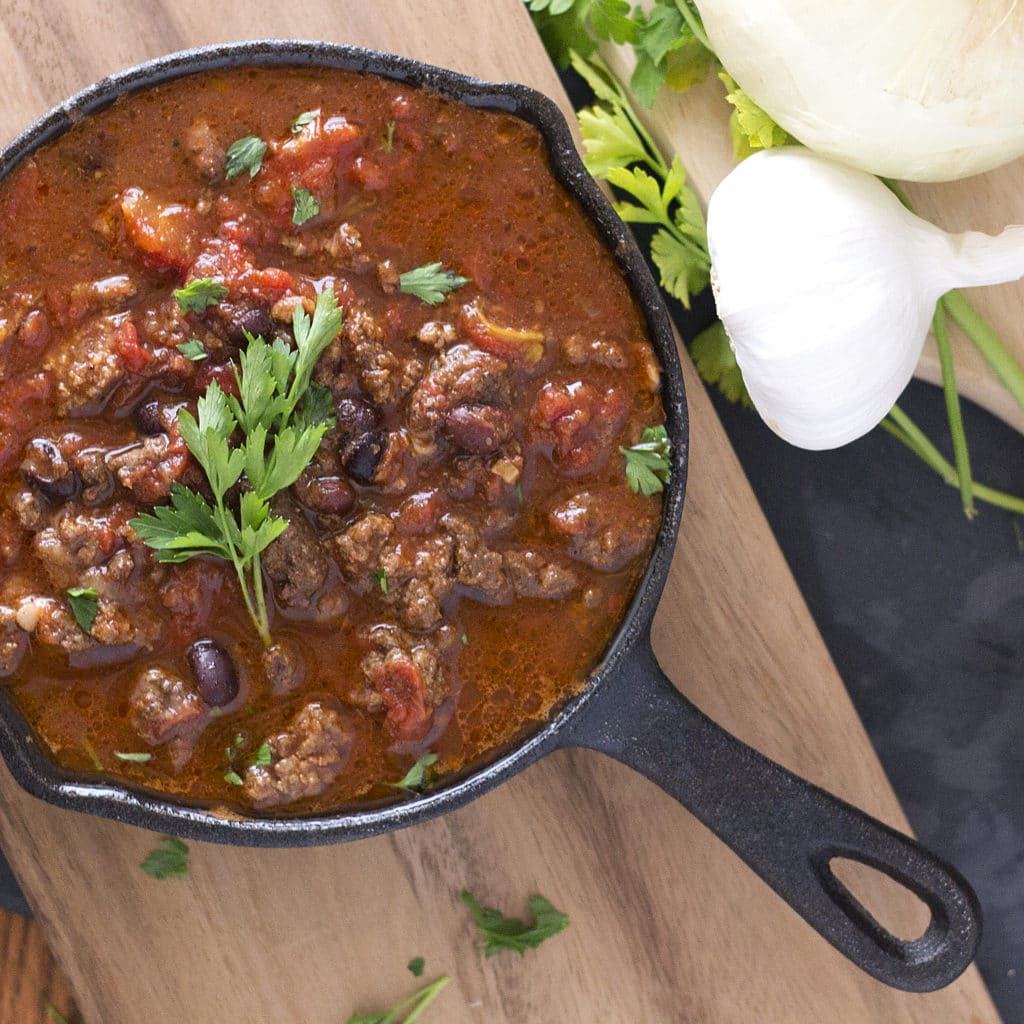
These saucy Spicy Sriracha Party Meatballs are so pop-able, you won’t be able to stop at just one! And, you guessed it, they happen to be grain-free, gluten-free and paleo so go ahead and pop away and add them to your football Sunday spread!

Meatballs3

I’ll be honest, I’m not a huge football fan but I was happy the Patriots won last night! My family, originally hailing from Massachusetts, loves the Patriots. My dad rarely misses a game, and if they happen to be losing (which thankfully doesn’t happen often) you would think the world may be coming to an end. His passion for the Patriots runs deep, lol. He knows all the players by name and will talk to them through the TV (as if they can hear them) saying things like “Come on, Brandy, what the heck was that?,” which is then followed by an expanse of silence in which it appears Brady is expected to answer, or something….. haha….

Meatball4

My Grandfather was also a dedicated and life-long Patriots fan. He religiously watched every game from his favorite plush light blue recliner. I don’t doubt that he is still keeping track of their performance from above and helping them out occasionally….Miss you, XO!

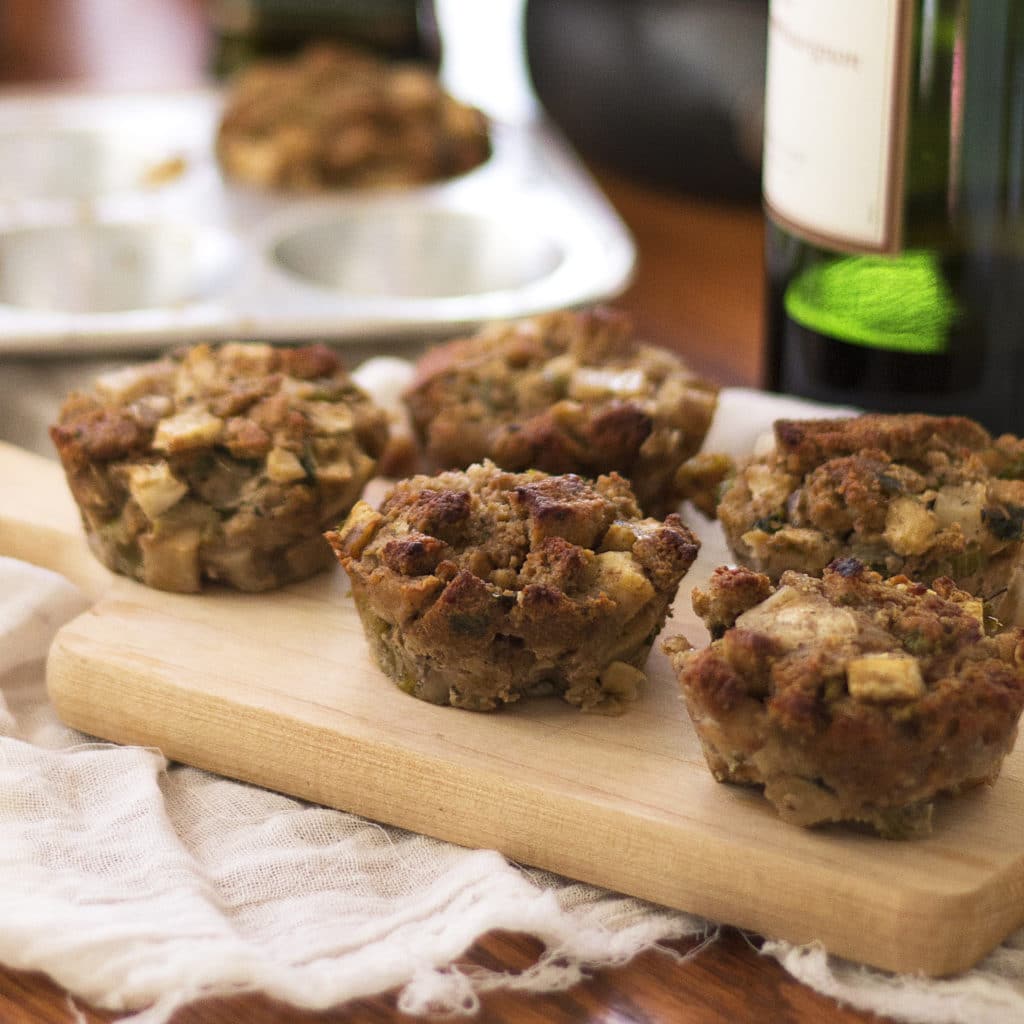
So these cocktail meatballs are the perfect party food, and a great appetizer for all you football fans out there. I found a neat way to cook the meatballs, which gets them nice and golden brown without having to brown them first in a pan. My meatballs always got smooshed and flattened when I tried to roll them around to brown them in a pan. I wanted these beauties to be perfectly round and presentable so I used a mini cupcake tin which made browning these meatballs extra easy.

Meatballs1

Voila-perfectly round and evenly browned meatballs!

Meatball5

Spicy Sriracha Party Meatballs {Grain-Free, Gluten-Free, Paleo}

These saucy Spicy Sriracha Party Meatballs are so pop-able, you won’t be able to stop at just one! They also happen to be grain-free, gluten-free and paleo so go ahead and pop away and add them to your football Sunday spread!

MEATBALLS:

  • 2 lbs grass fed ground beef
  • 1 pasture-raised egg
  • 1 garlic clove minced
  • 2 tablespoons minced shallot (or sweet onion)
  • 1 teaspoon coconut aminos or worcestershire sauce
  • 1 teaspoon dijon mustard
  • 1 teaspoon salt
  • 1/4 teaspoon black pepper

SAUCE:

  • ¼ cup shallot (or onion, finely minced)
  • 4 garlic cloves (finely minced)
  • 1 tablespoon of olive oil or oil of choice
  • 1 teaspoon hot paprika
  • ½ teaspoon of celtic sea salt or Himalayan salt
  • ½ teaspoon black pepper
  • 2 cup of canned tomato sauce
  • 1/3 cup water
  • 1/4 cup coconut sugar
  • 3 tablespoons honey
  • 2-3 tablespoons Sriracha (depending on how spicy you like it)
  • 1 teaspoons coconut aminos (or Worcheshire sauce)
  • 1 teaspoon apple cider vinegar
  1. Preheat oven to 375 degrees F
  2. If using lean meat you may want to grease the mini muffin tin with avocado oil or olive oil.
  3. Combine the ground beef, egg, garlic, onion, coconut aminos, dijon, salt and pepper in a bowl and mix well using your hands.
  4. Form 1”-1.5” balls (depending on the size of your muffin tin) and drop them into the compartments.
  5. Bake at 375 degrees F for 10-12 minutes then flip the meatballs around in the compartments and cook for additional 5 minutes so they are evenly browned.
  6. To make the sauce place the olive oil in a large sauce pan over medium-high heat.

  7. Add the minced shallot, garlic, paprika, salt and pepper.
  8. Cook until onions are soft, translucent and fragrant.
  9. Add the cup of tomato sauce and ¼ cup water and stir.
  10. Turn the heat down to medium and add the remaining ingredients: honey, coconut sugar, Sriracha, apple cider vinegar, and coconut aminos.
  11. Let the sauce simmer over medium heat for 5-10 minutes, occasionally stirring.
  12. Add the meatballs to the sauce and stir to coat them evenly, serve and enjoy!

Meatballs Collage


Sweet & Salty Wings

Sweet Salt and Malt Wings2
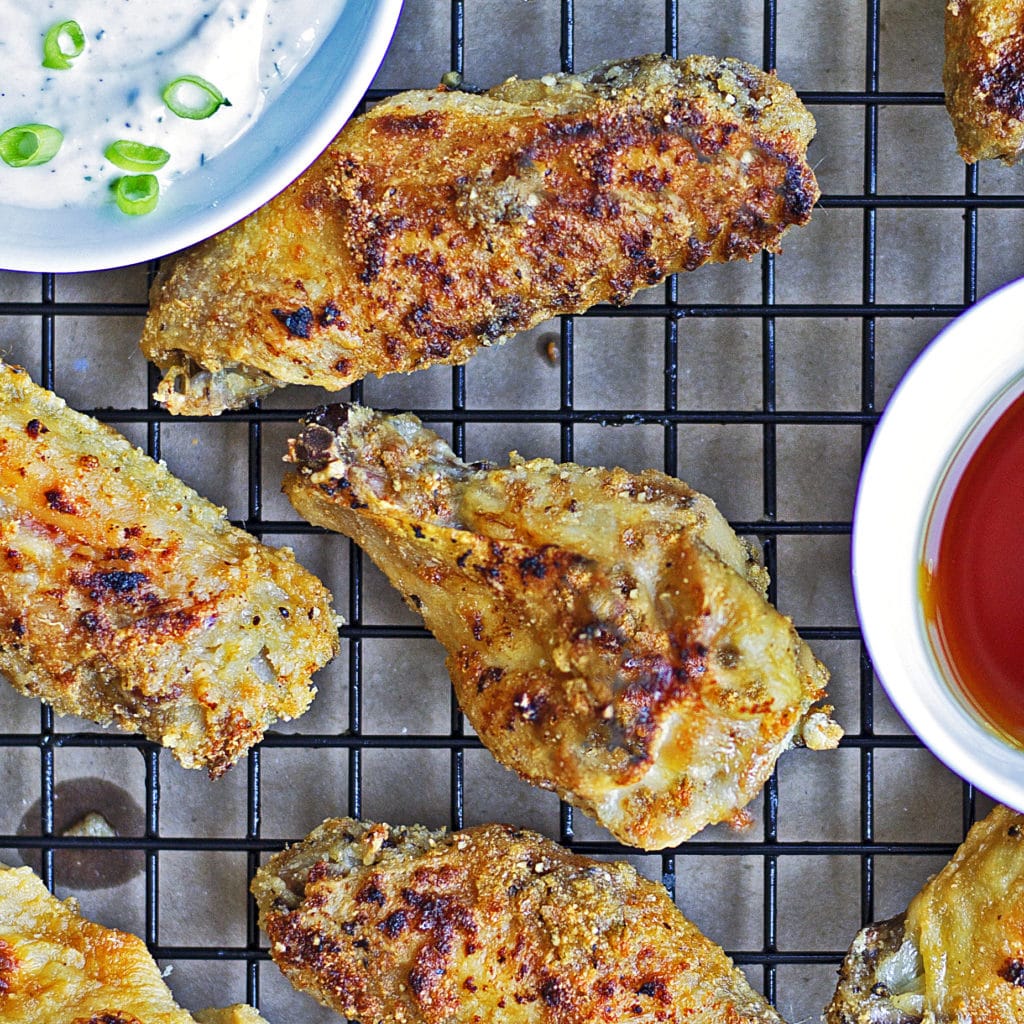
These sweet and salty wings are super crispy- you’ll never know they are not fried! They have the perfect flavor combination of subtle sweetness and savory saltiness that will entice your taste buds!

There was a wings only restaurant in the town I grew up that served over 100 flavors of wings- can you believe that? Yes- it was pretty amazing! They even gave you free wings on your birthday, how many would depend on your age…This is possibly the ONLY GOOD thing about getting older! haha

Sweet Salt and Malt Wings3I have tried many wing flavors, even some strange ones like Fire and Ice (which is ranch, horseradish and hot sauce!), but my all time favorite is salt and malt. As a kid I was addicted to salt and vinegar potato chips and would dip french fries in malt vinegar. I love pickles too! I guess I just really like the taste of vinegar.

Don’t worry these wings will not make your mouth pucker with overwhelming vinegar taste. They have a hint of vinegar, balanced with a blend of spices and a hint of sweetness. Just to convince you that everyone will love these, I did a taste test with Cricket. I offered her a plain chicken wing (don’t worry, I deboned it for her), as well as a piece of chicken with my sweet salt and malt seasoning. Cricket went to the sweet and salty one first and scarfed it down! Then she ate the plain one… I know what you’re thinking- maybe it’s not a fair test, and you are right if you are thinking she’d eat pretty much anything resembling and smelling like chicken!

Sweet Salt and Malt Wings1

Nagi, from RecipeTin Eats, has a great method of baking the wings to get them extra crispy, just like they had been deep fried. I used her method and they turned out great! Much of the fat cooks off the wings, so they are healthier, but you’ll never know!

Sweet Salt and Malt4

Everyone going to LOVE these!

Sweet & Salty Wings

These sweet and salty wings (think kettle corn!) are super crispy- you’ll never know they are not fried!

  • 4 lbs of all natural chicken wings
  • 2 tablespoons of baking POWDER (not soda)
  • ¾ teaspoon Himalayan or sea salt
  • 2 tablespoons maple syrup
  • 3 tablespoons malt vinegar (or apple cider vinegar)
  • Dry Spice Mix:
  • 2 teaspoons onion powder
  • 3 teaspoons garlic powder
  • 2 teaspoons Himalayan or sea salt
  • 1 teaspoon black pepper
  1. Preheat oven to 250 degrees F and place one rack in the lower-middle portion of the oven, and another rack in the upper-middle position.
  2. Line a cookie sheet with foil and place a wire rack on top (the kind you use to cool baked goods).
  3. Pat the wings dry (make sure you cut them at the joint if they aren’t cut already).
  4. Place the wings in a large ziploc, add the baking POWDER and ¾ teaspoon of salt and shake vigorously so they are evenly coated.
  5. Line the wings up on the wire rack (which is on the cookie sheet) and place them in the oven at 250 degrees F on the bottom-middle rack.
  6. Meanwhile mix the dry spices in a medium bowl, and mix the maple syrup and malt vinegar in a separate large bowl.
  7. After the 30 minutes is up turn the oven temperature up to 425 degrees F, and move the wings to the upper-middle rack position.
  8. Bake the wings for another 40 minutes, and flip them halfway through to make sure both sides get crispy.
  9. Remove the wings from the oven, and toss them in the maple syrup-malt vinegar mixture, then toss in the spice mix.

Sweet and Salty Wings Collage

Chipotle Bison Chili {Slow Cooker, Grain-Free}

Bison Chipotle Chili2Nothing warms you up on a cold winter day like a big bowl of chili! It’s also perfect for football Sunday! This hearty chili is made with ground bison, and has wonderful smokey and spicy flavors. Grass-fed bison is an excellent protein source that is high in protein, just like ground beef, but is lower in fat, making this chili a healthy alternative. It’s gluten free, grain-free and paleo as well.

Lately I’m into set-it-and-forget it meals. I’m sure many of you out there can relate to just not having enough time in the day, right? I mean, where does it go? I wake up and stumble over the coffee pot to push the “GO-aka COFFEE NOW!!” button (I make sure to set it up the night before because last time I didn’t I brewed some delicious water, sans coffee. I had left out the coffee grounds in my sleepy stupor, lol!). Before I know it it’s lunch time, baby goes down for a nap, dryer chimes indicating a mountain of laundry needs to be folded, sun is setting (ALREADY-GRRR!!!) and then it’s bedtime. Sleep, wake, repeat… You know the drill. So often I don’t have time to plan and cook dinner, nor do I want a load of dishes to scrub. So these days I’m a slow cooker and pressure cooker kinda gal.

I love stews, chilis and soups because they are a complete meal in one bowl. I make sure they are packed with protein, healthy fats and veggies providing a nice balance of nutrition. Better yet, they provide great leftovers, so I don’t have to scramble to make lunch the next day. As you may know, I make my pup Cricket her very own grub, and her chow is all made in the crock pot or pressure cooker as well. Be sure to check out my doggie recipes! Awww- she’s so cute posing with her brother’s safari animals!

Bison Chili Cricket

I chose to use bison in this particular chili because, first of all, I love the flavor and nutrition it provides, and secondly, I couldn’t find any grass-fed ground beef at the grocery store. I did, however, find grass-fed bison and it made the perfect substitute. You’d never know it’s not beef! It’s very important to consume pasture raised animals because their meat provides much better nutrition (such as more omega 3’s and is lower in fat) as compared to their conventionally-raised counterparts. You can read more about that HERE.

Bison Chipotle Chili 1

The whole family will love this chili, I promise!

Chipotle Bison Chili

  • 2 lbs grass fed ground bison
  • 1 teaspoon baking soda
  • 2 tablespoons water
  • 2 cups beef broth
  • 2 cans diced tomatoes with chilis
  • 1 can whole tomatoes
  • 2 tablespoons of chili in adobo (chilis and sauce or use about 2 teaspoons of chipotle chili spice, chopped)
  • 4 strips natural bacon (diced)
  • 1 yellow onion
  • 4 garlic cloves (diced)
  • 2 tablespoons coconut aminos (or Worcestershire sauce)
  • 2 tablespoons tomato paste
  • 2 tablespoons olive oil
  • Salt and pepper
  • 2 tablespoons cumin
  • 1 tablespoon coriander
  • 1 tablespoon sweet paprika
  • 1 teaspoon allspice
  • 1 teaspoon oregano
  1. Mix the 2 tablespoons of water with the baking soda and mix well.
  2. Combine the meat with the baking soda water mixture and mix well; let stand 30 minutes. This will help the meat get brown and crispy when you cook it.
  3. In a large pot heat the oil and add the bacon, onions and garlic and cook for 2 minutes over medium-high heat, then add all the spices and salt and pepper and cook for an additional minute.
  4. Next add the bison and continue to cook over rmedium-high heat, until the meat is deep brown and crispy.
  5. (NOTE: If you have a pressure cooker you can brown the meat along with the onions and garlic in the bottom of the pressure cooker, then add liquid ingredients and set to cook- easy and quick!)
  6. Place this meat mixture into the crockpot, along with the coconut amino, tomato paste, can of whole tomatoes, 2 cans of diced tomatoes, beef broth, and chilis in adobo.
  7. Set the slow cooker to high for 1 hour, then reduce to low and cook for an additional 2-3 hrs.
  8. Stir and mash up the tomatoes (once they are broken down from the heat) to blend and thicken the chili.

Bison Chipotle Collage

Cracklin’ Bacon {Sweet, Spicy, Crispy Goodness}

Cracklin Bacon3

This Cracklin’ Bacon is SO ADDICTIVE! It’s crispy, sweet and spicy. It’s super easy to make and contains no refined sugars and no bad-for-you ingredients, making it paleo- friendly!

Make this bacon for a brunch or weekend breakfast. Make it for football Sunday. Pair it with turkey and avocado, for a flavor-packed lunch. Eat it for dessert- haha, really! YES, it’s really that good.

Cracklin Bacon2

Everybody in this house loves bacon, Cricket included! As she watched me make this crackling’ bacon, she kept pawing my leg and begging me to have a taste. The smell of bacon drives her crazy. My husband isn’t much better and repeatedly asked me when the bacon was going to be ready to eat?? “Is it ready YET??” Then as soon as I put the plate of cracklin’ bacon on the kitchen table it was gone.

Cracklin Bacon1

Well, here you go… It may just change your life! You may never think of bacon the same way ever again 🙂

Cracklin’ Bacon {Sweet, Spicy, Crispy Goodness}

This Cracklin’ Bacon is SO ADDICTIVE! It’s crispy, sweet and spicy. It’s super easy to make and contains no refined sugars of bad-for-you-ingredients, making it paleo- friendly!

Make this bacon for a brunch or weekend breakfast. Make it for football Sunday. Pair it with turkey and avocado, for a flavor packed-lunch. Eat it for dessert- haha, really! YES, it’s really that good.

  • 1 package of thick cut all-natural bacon
  • 1/4 cup coconut sugar
  • 1/4 teaspoon espresso powder
  • 1/4 teaspoon paprika
  • 1/4 teaspoon nutmeg
  • 1/4 teaspoon chipotle chili pepper
  • 1/4 black pepper
  1. Preheat oven to 350 degrees F.
  2. Line a cookie sheet with foil.
  3. Mix the sugar and spices in a shallow bowl.
  4. Coat both sides of each bacon strip with the sugar spice mix and lay onto the foil-lined cookie sheet.
  5. Bake for about 20 minutes, or until crisp.
  6. Remove and place the bacon strips on a cooling rack and let them crisp up as they cool.

Cracklin Bacon Collage


Smoked Salmon & Creme Fraise on Yuca Crisps {Grain-Free, Gluten-Free, Dairy-Free and Paleo}

Smoked Salmon on Yuca Crisp1 These snackable smokey salmon appetizer bites are topped with tangy creme fraise, capers and lemon zest and sit atop a crispy yuca chip.

I love my appetizers and I love to snack. I like to try many things. I’m that kinda girl who orders a plate based on what everyone else at the table is ordering because I just can’t commit to one dish! Yes, I realize this is an annoying trait to my loved ones, but my passion for food and flavors gets the best of me! Sorry to all that have been at the other end of my fork popping up on their plate to have a taste 😉

Smoked Salmon on Yuca Crisp2

Appetizers are also one of my favorite aspects of a great party, after friends and family that is (and a nice glass of wine too!). I love to sample the plethora of various bite-sized creations of all different flavors and textures.

Smoked salmon has always been one of my favorite foods, and better yet, it’s healthy and packed with omega-3’s. I even often feed Cricket salmon for the same health reasons- it’s a great anti-inflammatory and promotes good cardiovascular health. Good nutrition from foods like salmon keep this pup looking young and limber so she can chase the squirrels around the yard!

Caption: “SQUIRREL?? WHERE!?”

Cricket Run 5 Cricket Run Collage

Today’s creation was made possible by some lovely smoked salmon we received as a Christmas gift. I was happy to eat it straight up, but I was inspired by one of my dad’s favorite appetizers that his girlfriend often makes. They are quite amazing and here is my grain-free, gluten-free version!

Smoked Salmon on Yuca Crisp3

Smoked Salmon Bites w/ Creme Fraise on Crisps {Grain-Free, Gluten-Free and Paleo}

These snack-able smokey salmon appetizer bites are topped with tangy creme fraise, capers and lemon zest and sit atop a crispy yuca chip.

  • 1 package of smoked salmon (lox)
  • 1 yuca (peeled, and cut into 3″ sections)
  • 2 tablespoons of capers
  • 1 lemon (1 teaspoon of juice and 1 tablespoon of zest)
  • 1/3 cup soaked raw cashews (soak for at least 2 hours, then drain)
  • 1/4 cup water
  • 1 teaspoon apple cider vinegar
  • 1/4 and 1/2 teaspoon celtic sea or Himalayan salt
  • 1/2 teaspoon black pepper
  • olive oil or avocado oil spray
  1. Preheat the oven to 375 degrees F.
  2. Place the peeled and sectioned yuca into a large pot and cover with water.
  3. Bring to a boil and cook until fork tender, then remove from heat and drain.
  4. Place the yuca in a large bowl and mash with a fork until fairly smooth, remove any fibrous parts that aren’t able to be mashed.
  5. Spray a cookie sheet with olive oil or avocado oil.
  6. Form 2″ patties with your hands, making them fairly thin, and spread them onto the cookie sheet.
  7. Sprinkle the yucca patties with salt and pepper and place them in the oven.
  8. Bake for about 10-15 minutes, until golden, then flip and bake an additional 5-10 minutes until both sides are golden brown and the patties are crisp, then remove from the oven.
  9. Place the soaked cashews into a high speed blender along with the water, 1 teaspoon of apple cider vinegar, and 1 teaspoon of lemon juice and 1/4 teaspoon salt.
  10. Blend on high until creamy and smooth (stop blender and scrape down sides as needed).
  11. Let the creme fraise chill in the fridge for 10 minutes to thicken.
  12. To arrange the bites place a chunk of smoked salmon (folded over) on a yucca crisp.
  13. Next place a heaping teaspoon of creme fraise on top of the salmon, and sprinkle with a few capers and lemon zest.
  14. Serve immediately, enjoy!

Smoke Salmon Collage

Stuffin’ Muffins {Grain-Free & Gluten-Free}

Stuffin Muffins2This grain free stuffing tastes just like the glutenous version, but is heavy on the veggies, and comes in cute muffin shapes for perfect personal portions!

Do you call it stuffing or dressing? Hailing from the Northeast, my family refers to it as stuffing, but whatever you choose to call it, it’s a necessary item at any holiday feast.

Stuffin Muffins3

Growing up I always requested the infamous “stuffing in a box,” and my mom would break out the Pepperidge Farm and whip me up my favorite stuffing. She would also make an “adult” version with cranberries, and maybe some apples and sausage, but I liked the good old simple kind. It was light and fluffy, bursting with herb and buttery flavors and I loved it!

As I grew up, my taste buds did too. I’ve tried all the other fancy adult stuffings, and I like them, don’t get me wrong, but I still have a special place in my heart for the boxed version. For the holiday season this year I wanted to make a healthy grain free stuffing that fell somewhere in the middle between the adult and child version; a stuffing that everyone at the table will enjoy! This recipe is loosely adapted and inspired by the Rachel Ray version- which are great! I also included a link in the recipe section to Grain Free Stuffing from Danielle Walker at Against All Grain (awesome blog! great recipes!), and her’s includes a recipe to make your own bread.

Stuffin Muffins1

Stuffin Muffins Collage

Stuffin’ Muffins {Grain-Free & Gluten-Free}

  • 1 loaf of almond bread (7.5” x 3.5”, I used Simple Mills Artisan Bread Almond Flour Mix Or make your own-Recipe from Against All Grain:/ (Will yield around 4 cups of ¼” bread cubes., cut into cubes)
  • 3 macintosh apples (¼”, peeled and diced into cubes)
  • 2 cups of turnip (¼”, peeled and diced and roasted*)
  • 2 cups of celery root (you may substitute parsnip, or do 4 cups of either turnip, parsnip,or celery root, ¼”, peeled and diced and roasted*)
  • 2 ribs of celery (chopped)
  • 1 yellow onion (diced)
  • 1 ½ cups to 2 cups of chicken or veggie broth
  • 2 eggs
  • 4 tablespoons butter
  • 1 bay leaf
  • ¼ cup of fresh parsley leaves (chopped)
  • 2 tablespoons of poultry seasoning
  • salt and pepper to taste
  1. Place the bread cubes on a cookie sheet and dry them out in the oven at 200 degrees for about 15-20 minutes, or until they are dry like bread crumbs.
  2. Preheat oven to 375 degrees F
  3. Place the diced turnip and celery root on a greased cookie sheet or roasting pan, and coat with olive oil (I used a mister) and sprinkle with salt and pepper.
  4. Roast the root veggies for about 45 minutes, or until fork tender and golden brown on the edges.
  5. Meanwhile heat a large skillet over medium high heat, and add the 4 tablespoons of butter and the bay leaf.
  6. Add the onions and celery, and cook a few minutes until translucent.
  7. Add the apples and seasonings (poultry seasoning, salt, pepper).
  8. Cook for about 5 minutes or until all the ingredients are softened.
  9. Turn off the heat, then add the dry bread cubes and roasted root veggies, and mix.
  10. In a separate bowl whisk 1 ½ cups of broth and 2 eggs (use 3 eggs if your eggs are not large).
  11. Pour the egg and broth mixture evenly over the bread and veggie stuffing and mix to coat evenly. The broth should moisten the mixture, but do not add so much that it become soggy.
  12. To test the consistency see if you can make a ball of stuffing in you hand that will hold its shape. If it doesn’t add additional broth until it does hold its shape.
  13. Grease a muffin tin generously with butter.
  14. Scoop the stuffing into the muffin tin and compact it tightly by pressing down with your hand so it will take the muffin shape and hold together.
  15. Bake in the oven at 375 degrees for about 15-20 minutes, or until golden and crisp on top.
  16. Remove and allow to cool for best removal.
  17. Use a knife to loosen the muffin by running it along and down the sides. (I found it best to loosen the edges with the knife, then I used a fork to lift up the muffin out of the tin.)
  18. If needed you can them place them on a pan to reheat in the oven.
  19. *Additional tips- It may be best to bake one muffin as a test to make sure they hold shape before you bake the entire batch. If you are having trouble getting the muffins to hold shape upon removal, make sure they are cooled first, try adding more broth or an additional egg to the mixture, and make sure you compact the stuffing tightly into the greased muffin tin.

Green Bean Casserole {Grain Free, Dairy Free, Paleo}

This Green Bean Casserole is so creamy and crunchy (thanks to the homemade French Fried Onions) and better than the original! You’ll never guess it’s gluten-free, grain-free, dairy-free, and paleo! (Yes, the Cream of Mushroom Soup recipe is Dairy Free!)

This Green Bean Casserole is so creamy and crunchy (thanks to the homemade French Fried Onions) and better than the original! You'll never guess it's gluten-free, grain-free, dairy-free, and paleo! (Yes, the Cream of Mushroom Soup recipe is Dairy Free!)

My absolute FAVORITE dish of the Thanksgiving Day feast is the Green Bean Casserole. I wait in anticipation all year for this dish and then eat the leftovers for the entire month of December then make it AGAIN for Christmas! That is how much I love it. Really.

This Green Bean Casserole is so creamy and crunchy (thanks to the homemade French Fried Onions) and better than the original! You'll never guess it's gluten-free, grain-free, dairy-free, and paleo! (Yes, the Cream of Mushroom Soup recipe is Dairy Free!)
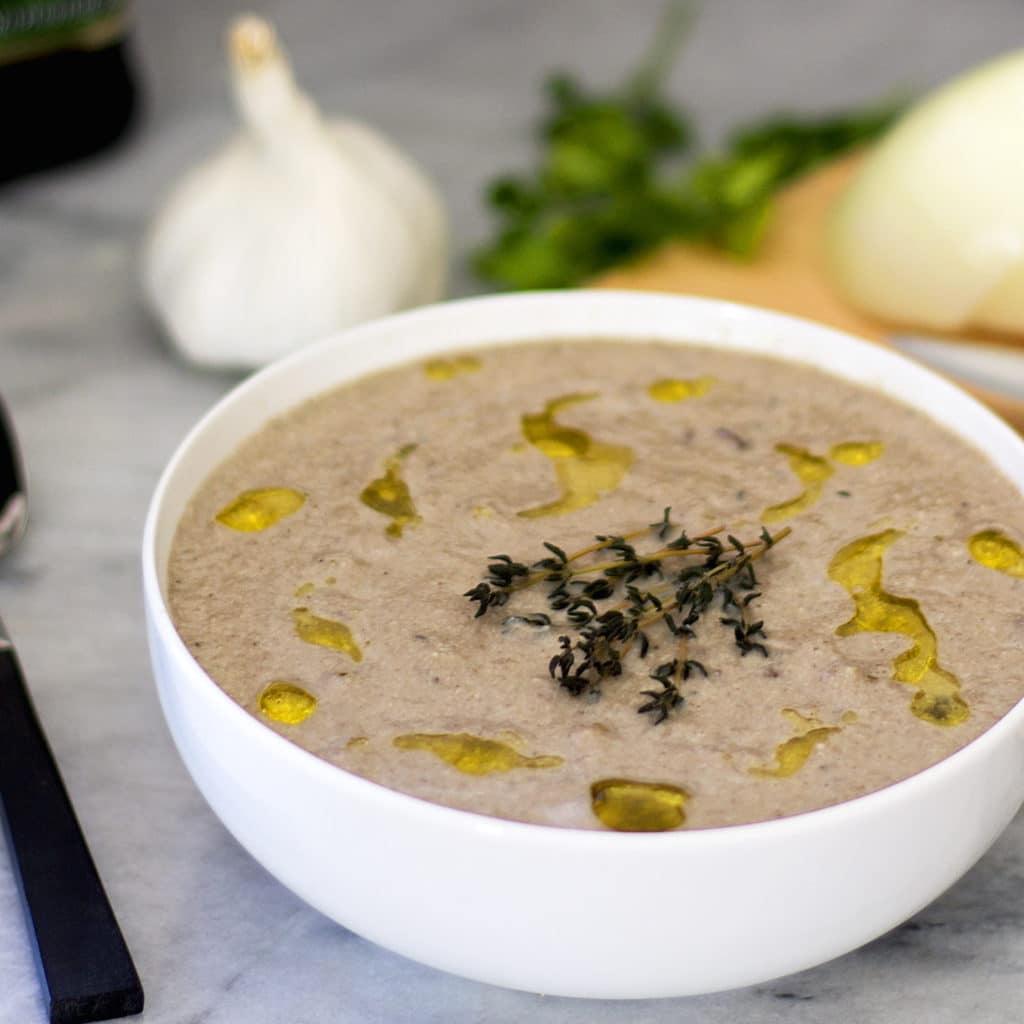
When I decided to clean up my diet I knew this was one dish I’d have to sacrifice. It’s made with canned cream of mushroom soup and french fried onions that have a buttery and crisp bread coating (yum.. mouth watering!), and the only “healthy” ingredient is the green beans. Truly, the veggies are just a way to get more creamy and crunchy goodness in every bite.

This Green Bean Casserole is so creamy and crunchy (thanks to the homemade French Fried Onions) and better than the original! You'll never guess it's gluten-free, grain-free, dairy-free, and paleo! (Yes, the Cream of Mushroom Soup recipe is Dairy Free!)I decided that there was no way I couldn’t at least try to replicate this dish in a healthy way, and I set out with great determination and resolve.

Cricket put on her new chef’s hat too and accompanied me in the kitchen for all the trials and tribulations. I offered her a few green beans to show my gratitude but she turned up her nose and looked at me as to say “Um, no… I’m waiting on the turkey!”

Cricket Hat

And guess what- it was a huge success! This dish has all the creaminess, thanks to the cashew cream, and crunchiness, from the grain-free coating on the fried onions. And yes, I have been eating the leftovers EVERYDAY since, and plan to make it again for Christmas 🙂

Green Bean Casserole2


This Green Bean Casserole is so creamy and crunchy (thanks to the homemade French Fried Onions) and better than the original! You'll never guess it's gluten-free, grain-free, dairy-free, and paleo! (Yes, the Cream of Mushroom Soup recipe is Dairy Free!)

HERE IS THE LINK TO THE CREAMY MUSHROOM SOUP (DAIRY-FREE): CREAMY MUSHROOM SOUP

Green Bean Casserole (Dairy free, Grain Free, Paleo, Vegan)

This Green Bean Casserole is so creamy and crunchy (thanks to the homemade French Fried Onions) and better than the original! You’ll never guess it’s gluten free, grain free, dairy free, vegan, and paleo!

  • 1.5 lbs french green beans ((1 bag, cut them into 1/2))
  • 3 cups Creamy Mushroom Soup ((only use 1 cup of broth to make a thick condensed soup))
  • 1/2 teaspoon Himalayan salt
  • 1/2 teaspoon black pepper
  • 1 tablespoon coconut aminos ((or Worcestershire sauce))
  • 1 cup French Fried Onions
  1. Preheat oven to 350 degrees F.
  2. Heat water in a large sauce pan over high until it reaches a simmer.
  3. Add trimmed and cut green beans to the water and cook a few minutes just until they turn bright green, but still crisp.
  4. Remove the green beans immediately and drain.

  5. In a large bowl combine and mix 3 cups of creamy mushroom soup, the blanched green beans, coconut aminos, salt and pepper, and ½ cup of french fried onion. 
  6. I recommend letting the green bean mixture sit for about 10 minutes, and some water may separate out. Simply pour it out of the bowl.

  7. Next, pour the mixture into a greased casserole dish and cover with foil.
  8. Bake at 350 for about 30 minutes or until green beans reach desired tenderness. (I prefer them on the crispier side.)
  9. Remove foil and sprinkle the remaining ½ cup of french fried onions on top, increase oven temperature to 425 degrees and move to a high rack in the oven for a few (3-5 minutes), or just until the top is golden brown and crisp.


This Green Bean Casserole is so creamy and crunchy (thanks to the homemade French Fried Onions) and better than the original! You'll never guess it's gluten-free, grain-free, dairy-free, and paleo! (Yes, the Cream of Mushroom Soup recipe is Dairy Free!)
This Green Bean Casserole is so creamy and crunchy (thanks to the homemade French Fried Onions) and better than the original! You’ll never guess it’s gluten-free, grain-free, dairy-free, and paleo! (Yes, the Cream of Mushroom Soup recipe is Dairy Free!)

French Fried Onions {Grain Free, Gluten Free, Paleo}

French Fried Onions2

These crispy and flavorful french fried onions are made from scratch and are gluten-free, grain-free and paleo. They add wonderful flavor to this green bean casserole, or you can use them to top your favorite soup or salad!

My favorite side dish of the holidays is the Green Bean Casserole. When I used to make it the “traditional” way (with a can of soup and french fried onions in a can), I would find myself snacking on the onions while assembling the casserole. They were buttery, crispy and so addictive.

Now that I am grain-free I had to recreate my favorite dish, and I had to get the most important ingredient- the french fried onion- right! After a few trial runs I perfected the coating and these french fried onions are just like the canned kind, if not better!

French fried onion1

French Fried Onions3

French Fried Onions {Gluten free-Grain Free-Paleo}

These crispy and flavorful french fried onions are made from scratch and are gluten free, grain free and paleo. They add wonderful flavor to this green bean casserole, or use them to top your favorite soup or salad!

  • 1 yellow onion (sliced thin)
  • ⅓ cup coconut flour
  • ⅓ cup arrowroot flour
  • ½ cup cashew milk (or almond milk)
  • ⅓ cup of ghee or other frying oil (avocado oil is a good alternative)
  • ¼ teaspoon salt
  • ¼ teaspoon pepper
  1. Slice the onion into thin rings (⅛” or as thin as possible) and place them in a bowl with the cashew or almond milk.
  2. Heat the ghee in a large saucepan, or high-side skillet (to prevent splatter), over medium high, then reduce to medium. The oil should sizzle when you add the onion however be careful not to have the heat too high that it burns the onion.
  3. Place the coconut flour, arrowroot flour, salt and pepper into a gallon Ziploc and give it a few shakes to mix.
  4. Next drain the onions and then add them into the bag of flour and shake well to coat.
  5. Remove the coated onions (in batches, don’t overcrowd them in the pan) from the bag and place them carefully into the fry oil.
  6. As they begin to brown turn them over to ensure even browning.
  7. Remove fried onions when they are golden brown and place on a paper towel to absorb excess oil.
  8. Store in an airtight container. If they become soft you can place them in the oven for a few minutes to get them crisp again.)

Creamy Mushroom Soup {Grain Free, Dairy Free, Paleo}

Mushroom Soup3This simple Creamy Mushroom Soup only take 15 minutes to make from scratch. It’s dairy free, grain free, super creamy and hearty to warm you up on those cold winter days!

Do remember the Soup Nazi episode on Seinfeld? lol! “No soup for you!” The Soup Nazi’s soups were so coveted, I can almost imagine how good they tasted. So I set out to make a soup that is that good- Soup Nazi good! So good you gotta have it! So good that you would cry if you heard “No soup for you! Come back one year!”

Soup making actually runs in my family. My mom makes a wonderful Curry Butterut Squash Soup that is sweet and spicy and I will be sure to share that one with you sometime soon! She also makes turkey chili and chicken soup with leftovers- easy, healthy, delicious, and thrifty! I even make soups and stews for Cricket, and I will be sure to share those pup-centric recipes too. Cricket is always wondering what’s cooking in the kitchen for her! lol

Cricket1

Well this soup isn’t meant for Cricket, it’s for you!  And it’s soooooo good. You may be surprised to learn that this  mushroom soup gets its creaminess from soaked cashews and pureed mushrooms and onion, which are caramelized first for extra flavor!

Mushroom Soup1It’s so rich and thick you’ll never guess its healthy and dairy free!

Mushroom Soup2

Mushroom Soup Collage

Creamy Mushroom Soup {Grain Free, Dairy Free, Paleo}

This simple Creamy Mushroom Soup only take 15 minutes to make from scratch. It’s dairy free, grain free, super creamy and hearty to warm you up on those cold winter days!

  • 3 ½ cups of baby bella mushrooms (1 8 oz package, chopped)
  • ½ cup yellow onion (diced)
  • 2 cloves garlic (diced)
  • 2 thyme sprigs (just leaves)
  • salt and pepper to taste
  • ½ cup raw cashews (or place in hot/boiling water for 15+ minutes until soft, soaked for 2 hours)
  • 2 cups chicken or veggie stock
  • 1 tablespoon extra virgin olive oil
  • 1 tablespoons of butter or olive oil
  1. Heat a skillet over medium high heat, add butter or olive oil (don’t use EVOO b/c it has a lower smoke point).
  2. Add garlic, onions, thyme leaves, salt and pepper and cook until onions are translucent and fragrant.
  3. Add mushrooms and continue to cook until mushrooms are soft and the moisture from them has evaporated off, about 5-6 minutes.
  4. Drain the cashews and place them in a high speed blender.
  5. Add the chicken or veggie stock and blend on high until mixture is silky and smooth.
  6. Next add ½ of the mushroom onion mixture and blend until smooth.
  7. Pour into a serving bowl and mix in the remaining mushroom and onion mixture.
  8. Note: If you want your soup to be fully creamy with no texture simply blend in the entire mushroom onion mixture.
  9. Upon serving top the bowl of soup with a healthy drizzle of EVOO.

Fruit Turkey with Chocolate Fondue {Video!}{Grain-Free,Paleo}

Fruit Turkey White

This Fruit Turkey Fondue doubles as a beautiful centerpiece and a delicious and healthy dessert for your Thanksgiving Day feast!

November has arrived and the holiday season is rapidly approaching! The holidays are my favorite time of year for 2 reasons- time with family and friends and lots of great food, of course!

I love to start off Thanksgiving Day by watching the Macy’s Thanksgiving Day Parade. A few years back (well maybe more than a few:)), I convinced my sister to accompany me into NYC to watch the famous parade in person. I was so excited to finally see the big balloons in person. They towered over the city blocks, and casted shadows on the parade goers below.  As the wind gusted, the balloon wrestlers on the ground would scamper around trying to keep these unruly balloons in some form of control. The wind was so strong I was waiting for one of them to be swept off the ground and fly threw the air at the mercy of the oversized Snoopy!

We stood a few rows back from the street peering up at the gigantic balloon characters jumping up and down and rubbing our hands together in an attempt not to freeze to death. We lasted about 45 minutes, until our extremities were blue and numb and then we threw in the towel. Yep- we left-it was just too darn cold!  It’s actually more enjoyable on tv, trust me! As we drove home, mouths’ salivating, we thought about the warmth and delicious smells that were happening in the kitchen.  At least we had burned a few extra calories suffering in the arctic freeze;) We made it home in time to watch the end of the parade on tv, and the final float was the Thanksgiving Turkey. In honor of that colorful turkey, I made my own this year- and it’s made from delicious, sweet and juicy fruit! Combined with a chocolate fondue for dipping, this turkey will be the center of attention at your T-Day table! 


Fruit Turkey Closeup

Fruit Turkey Collage

FRUIT TURKEY with CHOCOLATE FONDUE

A fruit turkey with chocolate fondue.

  • 1 cantaloupe
  • 1 pear
  • 6 baby carrots
  • wood skewers
  • Sliced assorted fruits such as strawberries (kiwi, bananas and pineapple)
  • 1 cup chocolate chips
  • 2 tablespoons coconut oil
  1. Slice off the bottom of the cantaloupe and scoop out the flesh. You can use a melon baller to make cantaloupe rounds to use on the “feather” skewers.
  2. Trim there carrots so they resemble turkey feet and place a skewer to hold them together, and cut off the excess skewer.
  3. Repeat for the second foot.
  4. Trim strawberries for the head details.
  5. Use the skewers to attach the pear to the cantaloupe to make a head, and the carrot feet to the body.
  6. Place your sliced fruit onto the skewers and place them on the rump as feathers.
  7. Use two banana slices and two chocolate chips to make the eyes and attach with a small skewer segment.
  8. Melt 1 cup of chocolate chips and 2 tablespoons in the microwave (stir occasionally) to make the fondue.